The long-term survival of a graphite drawing has less to do with spray fixatives and more to do with the materials that surround it.
- Cheap mounting boards and backing materials actively release acids that yellow and embrittle paper within years.
- Proper glazing (like Museum Glass) is not a luxury but a critical defense against UV light and the static electricity that can lift graphite particles.
Recommendation: Focus on creating a stable, acid-free micro-environment using reversible techniques, treating the frame as a preservation system, not just a decoration.
As a collector, you’ve likely felt a quiet dread watching a cherished graphite sketch. Will its delicate lines soften and fade? Will the crisp white paper turn a brittle, sickly yellow? The common advice is to reach for a can of spray fixative, a seemingly simple solution to lock the image in place. Some even advocate for makeshift solutions like hairspray, a practice that causes archivists to shudder. These methods, while well-intentioned, are often irreversible and can introduce chemicals that cause more harm than good over the decades.
The truth, learned over centuries of paper conservation, is that lasting preservation is an act of environmental control. The real enemies of your collection are often invisible: the acid migrating from a cheap backing board, the static charge from a sheet of standard acrylic, and the UV rays from a sunlit wall. True archival care is not about coating the artwork in a permanent chemical shield, but about building an entirely inert, protective, and, crucially, reversible habitat around it.
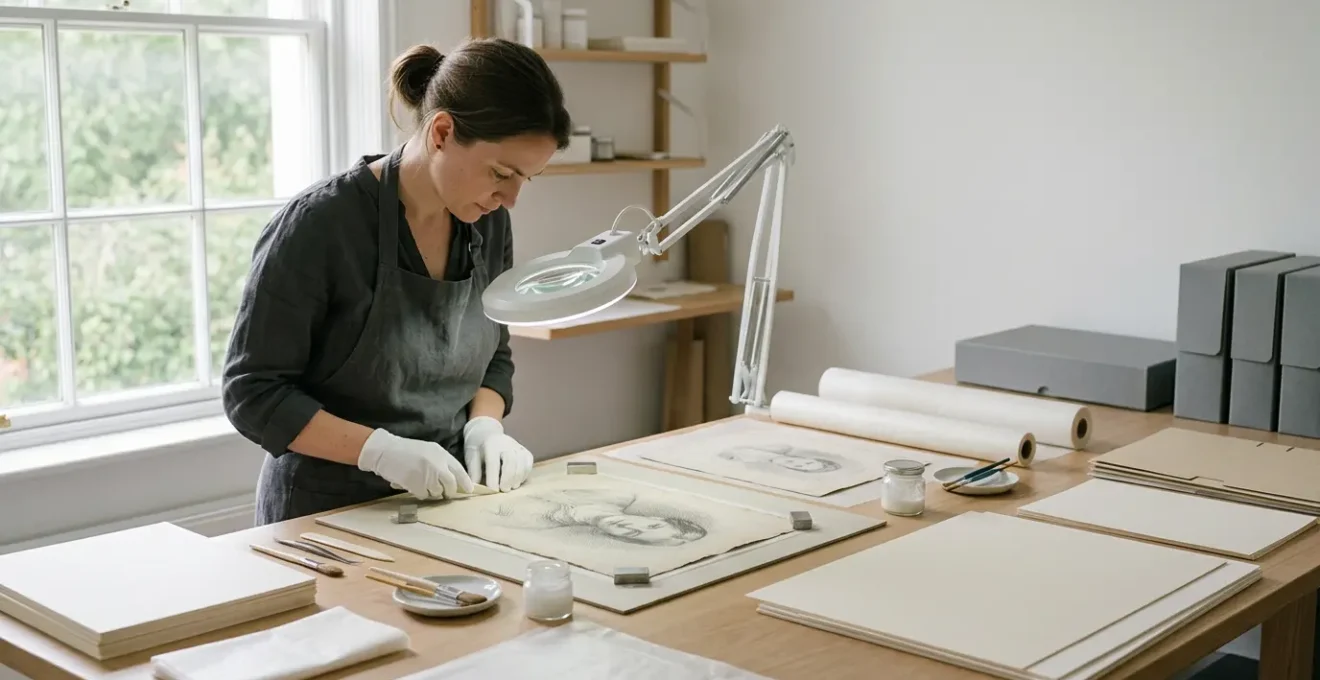
This guide will walk you through the professional methodologies for creating that safe micro-environment. We will dissect the components of a proper archival frame, from the mounting board to the glass. We’ll cover the precise handling techniques that prevent irreversible smudges and explore the difficult decision of when to treat—and when to leave alone—the inevitable spots of age. This is how you move from simply owning a drawing to becoming its dedicated custodian, ensuring it survives not just for 20 years, but for generations.
In the following sections, we will systematically address the critical factors that determine the longevity of your paper-based artworks. This structured approach will equip you with the knowledge to make informed decisions, transforming your collection’s storage from a liability into an asset.
Contents: A Conservator’s Preservation Framework
- Why does cheap mounting board turn your sketches yellow within 5 years?
- How to apply Japanese hinges to float-mount a sketch without glue damage?
- Museum Glass or Standard Acrylic: is the cost difference worth it for graphite?
- The handling mistake that permanently smears soft graphite detail
- When to treat foxing spots: balancing risk versus visual improvement
- How to pack sodden archives for the freezer to stop mould growth?
- Why does using the wrong foam degrade bronze artifacts over time?
- Safeguarding History: Disaster Response Planning for Small Museums?
Why Does Cheap Mounting Board Turn Your Sketches Yellow Within 5 Years?
The most insidious damage to a drawing often comes not from an external event, but from the very materials chosen to “protect” it. Standard, non-archival mounting boards are typically made from wood pulp that has not been chemically purified. This pulp contains lignin, an organic polymer that breaks down over time, releasing acids. This process, known as acid migration, is the primary culprit behind the characteristic yellowing and embrittlement of paper.
The damage is slow but relentless. The acid-laced molecules from the backing and mount board steadily seep into the fibers of your artwork’s paper. According to framing experts, this process can cause visible decay in as little as five years. The result is a stained, discolored perimeter and a weakened paper structure that is more susceptible to tearing. What began as a pristine sketch is now permanently marred by the frame that was meant to preserve it.
Distinguishing between safe and harmful materials is therefore the first and most critical step in archival framing. Conservation-grade boards, by contrast, are manufactured to be completely acid-free and lignin-free. “Museum board” is the highest standard, made of 100% cotton fiber (rag), which is naturally inert. “Conservation board” is a more affordable yet still excellent alternative, made from purified and buffered wood pulp. These materials create the stable, non-reactive environment essential for long-term preservation.
Your Action Plan: Identifying Acidic Boards
- Examine the Bevel: Look at the 45-degree cut where the window mat meets the art. A stark white bevel indicates a likely archival board. A cream or yellowing bevel is a red flag for an acidic core.
- Check for Certification: Look for explicit labels on the board’s reverse side, such as “acid-free,” “archival quality,” “museum quality,” or “conservation quality.” Absence of these terms is a strong warning.
- Understand the Fiber: True museum board is 100% cotton fiber and contains no wood pulp. While harder to verify visually, this is the gold standard for materials in direct contact with valuable art.
- Verify Buffering: Quality archival boards are “buffered” with an alkaline substance (like calcium carbonate) to help neutralize acids from the environment over time, providing an active layer of defense.
- Consider the Cost: While it shouldn’t be the only factor, there is a significant price difference. If a framing quote seems unusually low, inquire specifically about the brand and type of mat board being used.
Ultimately, choosing a conservation-grade mount board is not an expense; it is the most fundamental insurance policy you can buy for your paper-based art.
How to Apply Japanese Hinges to Float-Mount a Sketch Without Glue Damage?
Once you have an archival board, the next challenge is attaching the artwork to it. Common adhesives like tape or rubber cement are a death sentence for paper; their acidic compounds cause irreversible staining and become brittle. The professional solution is both elegant and ancient: Japanese paper hinges adhered with a pure wheat starch paste. This method’s guiding principle is reversibility—the hinge should be the weakest link, designed to tear before the artwork does, and the adhesive should be removable with water without leaving a trace.
The process requires precision. Small tabs are created from a high-quality, long-fibered Japanese paper, such as kozo or toso tengujo. The edges of these tabs are often “feathered” by carefully tearing them against a straight edge while damp, creating a soft, fibrous border that integrates more smoothly onto the back of the artwork. This avoids creating a hard, visible line that could emboss the front of the drawing over time.
The adhesive is just as critical. A study on conservation adhesives notes that wheat starch paste is the primary adhesive for Western paper conservators and the standard against which all others are judged. It is incredibly strong yet can be thinned with distilled water for use on the most delicate papers. A small amount of this paste is applied to the hinge, which is then carefully positioned on the back of the artwork and pressed into place under a small weight until dry. The other end of the hinge is then attached to the archival backing board.
There are several types of hinges for different needs. A simple “T-hinge” (a pendant hinge held down by a crossbar of tissue) is common for float-mounting. For heavier works, “V-hinges” or “S-hinges” provide more robust support while maintaining full reversibility. For the utmost in non-invasive mounting, “corner pockets” made from folded archival paper can be used, where no adhesive ever touches the artwork itself. These techniques ensure the art is held securely but can be freed from its mount decades later without a single sign of its prior attachment.
This commitment to non-damaging, reversible techniques is the very heart of professional conservation and a stark contrast to the permanence of commercial tapes and glues.
Museum Glass or Standard Acrylic: Is the Cost Difference Worth It for Graphite?
The glazing—the clear material between your artwork and the world—is not just a dust cover; it is an active environmental shield. The choice of glazing is particularly critical for graphite, a medium that is sensitive to both light and static electricity. While the high cost of “Museum Glass” can be daunting, understanding its properties reveals why it is the professional standard for valuable works.
The first and most significant threat is ultraviolet (UV) light. UV rays are present in all daylight and even in some indoor lighting. They are a high-energy form of radiation that breaks down the chemical bonds in paper and media, causing fading, discoloration, and embrittlement. Standard glass or acrylic offers virtually no UV protection. Conservation-grade glazing, including Museum Glass and UV-protective acrylic, filters out 99% of harmful UV rays, dramatically slowing this aging process. This is the single most important function of archival glazing.
The second threat, specific to friable (powdery) media like charcoal and soft graphite, is static electricity. Standard acrylic (Plexiglas) generates a significant static charge, especially when cleaned. This charge can be strong enough to physically lift graphite particles off the paper’s surface, smudging the image and depositing a “ghost” of the drawing on the inside of the acrylic. For this reason, standard acrylic should never be used for unfixed graphite works. While anti-static acrylics exist, Museum Glass has no static issues.
The final factor is visual clarity. Museum Glass has an advanced anti-reflective coating that makes it seem almost invisible, allowing for an uninhibited view of the artwork’s texture and detail. This a significant upgrade over the high reflectivity of standard glass and acrylic.
This table from a recent comparative analysis breaks down the options, clarifying the trade-offs between cost and protection. As it shows, the choice directly impacts the long-term safety and viewing experience of your artwork.
| Glazing Type | UV Protection | Static Risk | Optical Clarity | Best Use Case |
|---|---|---|---|---|
| Standard Glass | None | None | Good | Temporary display only |
| Conservation Clear Glass | Basic | None | Good | Student work |
| UV-Protective Acrylic | 99% | High (requires spacing) | Good | Sentimental family pieces |
| Anti-Static Acrylic | 99% | Minimal | Good | Graphite/charcoal minimum standard |
| Museum Glass | 99% | None | Excellent (anti-reflective) | Masterpieces/collected works |
For any work of significant monetary or sentimental value, the cost of Museum Glass is a worthwhile investment. It provides a trifecta of protection—UV filtering, zero static, and optical purity—that no other single product can match, ensuring the drawing is both safe and beautifully visible for decades.
The Handling Mistake That Permanently Smears Soft Graphite Detail
The most direct threat to a graphite drawing is the human hand. The surface of our skin, even when clean, contains oils and acids that are detrimental to paper. These oils can cause subtle smudging of the graphite, attract dust that becomes embedded in the paper fibers, and over time, can lead to permanent, dark fingerprints that are impossible to remove. The cardinal rule of handling any unfixed drawing is simple: do not touch the surface. Ever.
Professional conservators and archivists adhere to a strict protocol. Artworks should always be handled by the clean margins, holding them with two hands to provide adequate support and prevent creasing. For frequent handling or for works with no margins, clean, white cotton or nitrile gloves are mandatory. This prevents the transfer of skin oils. It is also crucial to work on a large, clean, flat surface, completely free of any food, liquids, or other contaminants.
A common mistake occurs when placing a protective sheet over a drawing. Many people will lay a sheet of glassine or archival tissue on the work and then slide it into position. This seemingly innocent action can cause micro-smudging across the entire surface as the protective sheet drags microscopic graphite particles with it. The correct method is the “lift-and-place” technique: always lift the protective sheet completely off the surface before repositioning it. Never slide it.
For artists or those examining a work closely, additional tools are essential. One can use a clean sheet of paper placed under the hand to create a barrier between the skin and the artwork’s surface. A more professional tool is a mahl stick or bridge, which elevates the hand completely, allowing for detailed work without any contact. Storing unframed drawings is another critical point. They should be kept in archival-quality boxes, separated by sheets of acid-free glassine or tissue paper to prevent any rubbing or transfer between works.
Ultimately, every interaction with the artwork is a moment of potential risk. Adopting these disciplined, deliberate handling methods transforms that risk into an act of care, preserving the crispness and detail of the artist’s original marks.
When to Treat Foxing Spots: Balancing Risk Versus Visual Improvement
Over time, you may notice small, rust-colored or brown spots appearing on older paper artworks. This phenomenon, known as “foxing,” is a common form of age-related degradation. Understanding its causes is key to making informed decisions about treatment. There are two primary sources of foxing: one is biological, the other chemical. The first is the result of microscopic fungal or mold growth, which often occurs in environments with excessive humidity. The mold’s metabolic processes can stain the paper fibers.
The second cause is the oxidation of trace metallic particles—usually iron—left in the paper during its manufacture. As these tiny metal fragments rust over decades, they create the characteristic brown spots. Regardless of the cause, the question for the collector is always the same: should I have this treated?
The answer from a conservation perspective is nuanced and prioritizes the object’s structural integrity over pure aesthetics. The first step is assessment. A conservator will determine if the foxing is “stable” or “active.” If the spots have been present for years and are not spreading, they are often considered stable and part of the object’s history. In this case, the recommendation is frequently no treatment, as any intervention carries its own risks.
If the foxing is deemed active and spreading, it indicates an ongoing problem, likely environmental. According to the Library of Congress, this situation requires an immediate environmental change and professional assessment. Treatment might involve careful surface cleaning or humidification, but the goal is stabilization, not necessarily complete removal. Chemical treatments to bleach or remove foxing spots are a last resort. These treatments can be effective visually but are highly invasive and can weaken the paper’s cellulose structure, making it brittle and fragile in the treated areas. Under no circumstances should household products like bleach be used; they will destroy the paper.
The decision to treat is therefore a careful calculation. Is the visual disturbance of the spots greater than the inherent risk of a chemical intervention to the artwork’s long-term physical health? Often, the wisest and most professional choice is to accept the spots as marks of time and focus on stabilizing the environment to prevent further damage.
How to Pack Sodden Archives for the Freezer to Stop Mould Growth?
In a disaster scenario like a flood or burst pipe, water is the collection’s greatest enemy, primarily because it activates dormant mold spores. Once active, mold can begin to grow and stain paper within 48 to 72 hours. When faced with a large number of wet items that cannot be treated immediately, the single most effective emergency response is to freeze them. Freezing does not kill the mold, but it renders it completely inactive by stopping all water activity, effectively pressing “pause” and buying invaluable time for a planned, professional response.
The packing process is critical to prevent further damage. The goal is to isolate items and prevent them from fusing into a solid, inseparable block of ice. First, gently separate wet drawings if possible, without forcing any that are stuck together. Place a sheet of wax paper or freezer paper between each individual drawing. This non-absorbent layer will prevent them from freezing to one another.
Next, stack these interleaved drawings in small, manageable piles. Do not create stacks that are too thick, as this will slow down the freezing process in the center. Carefully slide these stacks into heavy-duty, sealable polyethylene freezer bags. Before sealing, press out as much air as possible to minimize the risk of freezer burn, where ice crystals can form and damage paper fibers. Label each bag clearly with its contents and the date using a permanent marker.
Once packed, the items should be placed in a freezer set to the coldest possible temperature (below -18°C or 0°F). The items can remain frozen indefinitely while you contact a paper conservator and arrange for proper drying, which is often done through a process called vacuum freeze-drying. This disaster response technique is a core part of professional archival planning and can be the difference between a recoverable incident and a total loss.
While this technique is highly effective, the best strategy is always prevention. Having a disaster kit with these supplies—wax paper, freezer bags, gloves—ready ahead of time is a hallmark of a responsible custodian.
Why Does Using the Wrong Foam Degrade Bronze Artifacts Over Time?
The question of bronze artifacts may seem out of place in a discussion on paper preservation, but it provides a powerful lesson in material science: chemical incompatibility. Certain foams, particularly older polyurethane or ether-based foams, are chemically unstable. Over time, they degrade and release corrosive gases, a process called “off-gassing.” For a bronze sculpture, this can lead to pitting and a destructive patina. For a graphite drawing, the lesson is identical: any unstable material within the enclosed micro-climate of a frame can, and will, damage the artwork.
This principle directly applies to the foam core board often used as a lightweight and rigid backing in picture frames. Standard foam core, available at any craft store, is not archivally safe. Its foam center and the paper liners laminated to it are acidic and will off-gas, contributing to the acid migration that yellows and embrittles the artwork it is meant to support. This is why a framer might offer a “barrier paper,” but this is an imperfect solution. The only truly safe approach is to use materials that are inert from the start.
Archival, acid-free foam board is fundamentally different. Its core is made from a stable, inert polystyrene that does not degrade or off-gas. Its surface papers are high-quality, buffered, and lignin-free, just like conservation mat boards. This creates a complete system where every component in contact with the artwork’s environment is chemically stable and non-damaging. The “bronze lesson” is that proximity matters, and hidden materials are often the most dangerous.
The following table illustrates a “rogues’ gallery” of common framing materials that, like the wrong foam for bronze, actively harm paper-based art over time, along with their safe, archival alternatives.
| Material | Damage Type | Time to Damage | Safe Alternative |
|---|---|---|---|
| MDF Backing | Formaldehyde off-gassing | 2-3 years | Acid-free foam core |
| Masking Tape | Adhesive staining/yellowing | 6-12 months | Japanese tissue hinges |
| Corrugated Cardboard | Acid migration/yellowing | 1-2 years | Conservation mat board |
| Rubber Cement | Permanent staining | Immediate | Wheat starch paste |
| Standard Foam Core | Off-gassing/acid damage | 3-5 years | Archival mounting board |
Therefore, when selecting a backing board, you must be as vigilant as a museum curator choosing a support for a priceless artifact. The chemical stability of every component is paramount.
Key Takeaways
- The materials surrounding a drawing (mat board, backing, glazing) are more critical to its long-term survival than any surface fixative.
- Always prioritize “reversibility” in your conservation choices; any treatment or mounting method should be undoable without harming the original artwork.
- The three main environmental enemies of paper are acid from poor-quality materials, UV light from all daylight, and physical damage from improper handling.
Safeguarding History: Disaster Response Planning for Small Museums?
While the term “disaster response plan” may conjure images of a large museum preparing for a hurricane, the core principles are directly scalable to a personal collection. Thinking like a museum registrar is the ultimate expression of stewardship. It means moving from a passive owner to an active, prepared custodian. The foundation of any such plan is knowledge: you cannot protect what you do not know you have.
The first step is to document and catalog your collection. For each important piece, take high-quality photographs from multiple angles and record all relevant information: artist, title, dimensions, medium, condition, and provenance. Note any existing damage, like foxing or tears. This inventory is invaluable for insurance purposes and for recovery efforts after an event. It is essential to store this documentation securely, with digital copies in cloud storage and a physical copy at a separate, off-site location.
A critical component of a modern preservation plan is creating what can be called a “digital hedge.” By creating high-resolution, color-calibrated scans of your most important drawings, you create an ultimate insurance policy against catastrophic loss from fire, theft, or irreparable damage. While the scan can never replace the original object, it preserves the image and its history for posterity. This digital surrogate becomes part of the artwork’s archival record.
Finally, establish a priority list. In an emergency evacuation, you may only have moments to act. Identify your five to ten most irreplaceable works—those with the highest monetary or sentimental value. Know where they are and have a plan for how to move them quickly and safely. This might involve having a designated archival portfolio or box readily accessible. This simple act of prioritization can make all the difference when time is short.
By documenting your collection, creating a digital hedge, and establishing priorities, you apply the same logic that safeguards national treasures to protect your own personal history. Begin today to implement these strategies and transform your role from a simple collector to a dedicated, long-term preserver of art.